

Step 1: Log In to Your Dashboard
Access Your Account:
- Open your browser and navigate to the astrology dashboard login page.
- Enter your registered email ID and password in the respective fields.
- If you’ve forgotten your password, click the Forgot Password link to reset it.
- Press the Sign In button to access your dashboard.
New to the Dashboard?
If you’re a new user, you can sign up for a 7-day Free Trial.

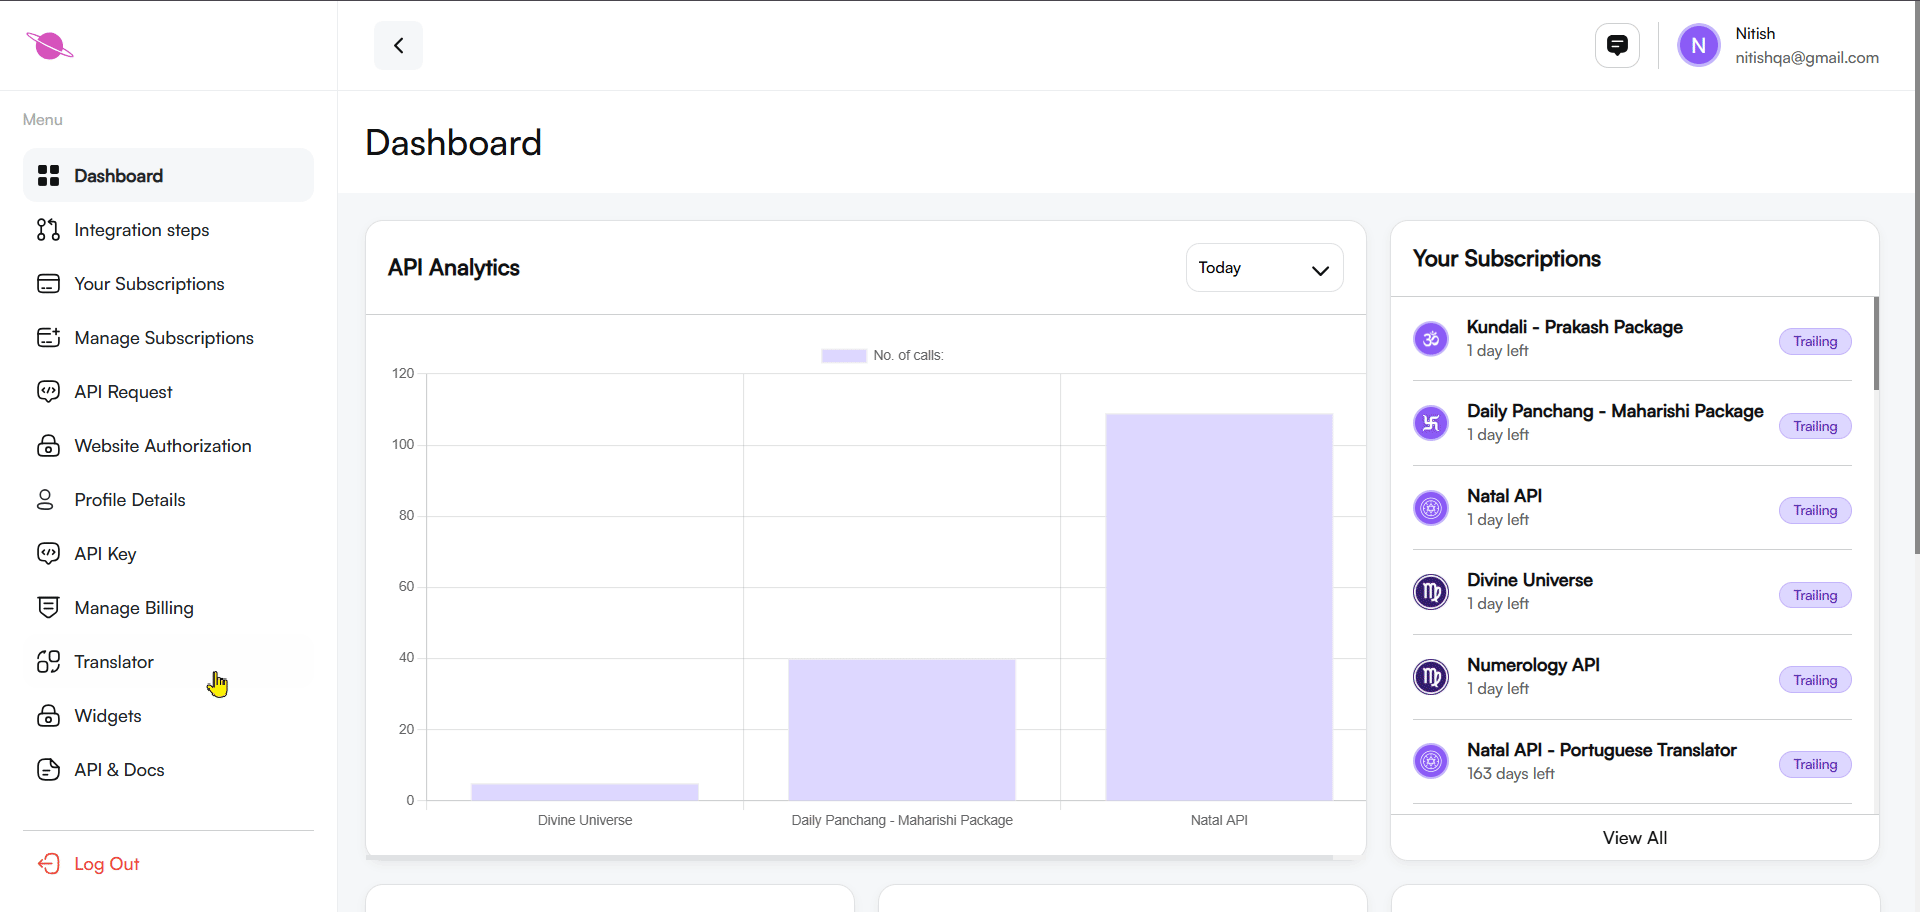
Step 2: Navigate to the Dashboard
Once logged in, you’ll land on the main dashboard, where you can manage key features such as subscriptions, API keys, billing, and widgets.
Locate the Widgets Option:
- In the left-hand menu, find the Widgets section.
- Click on it to access and manage the Daily Panchang widgets.

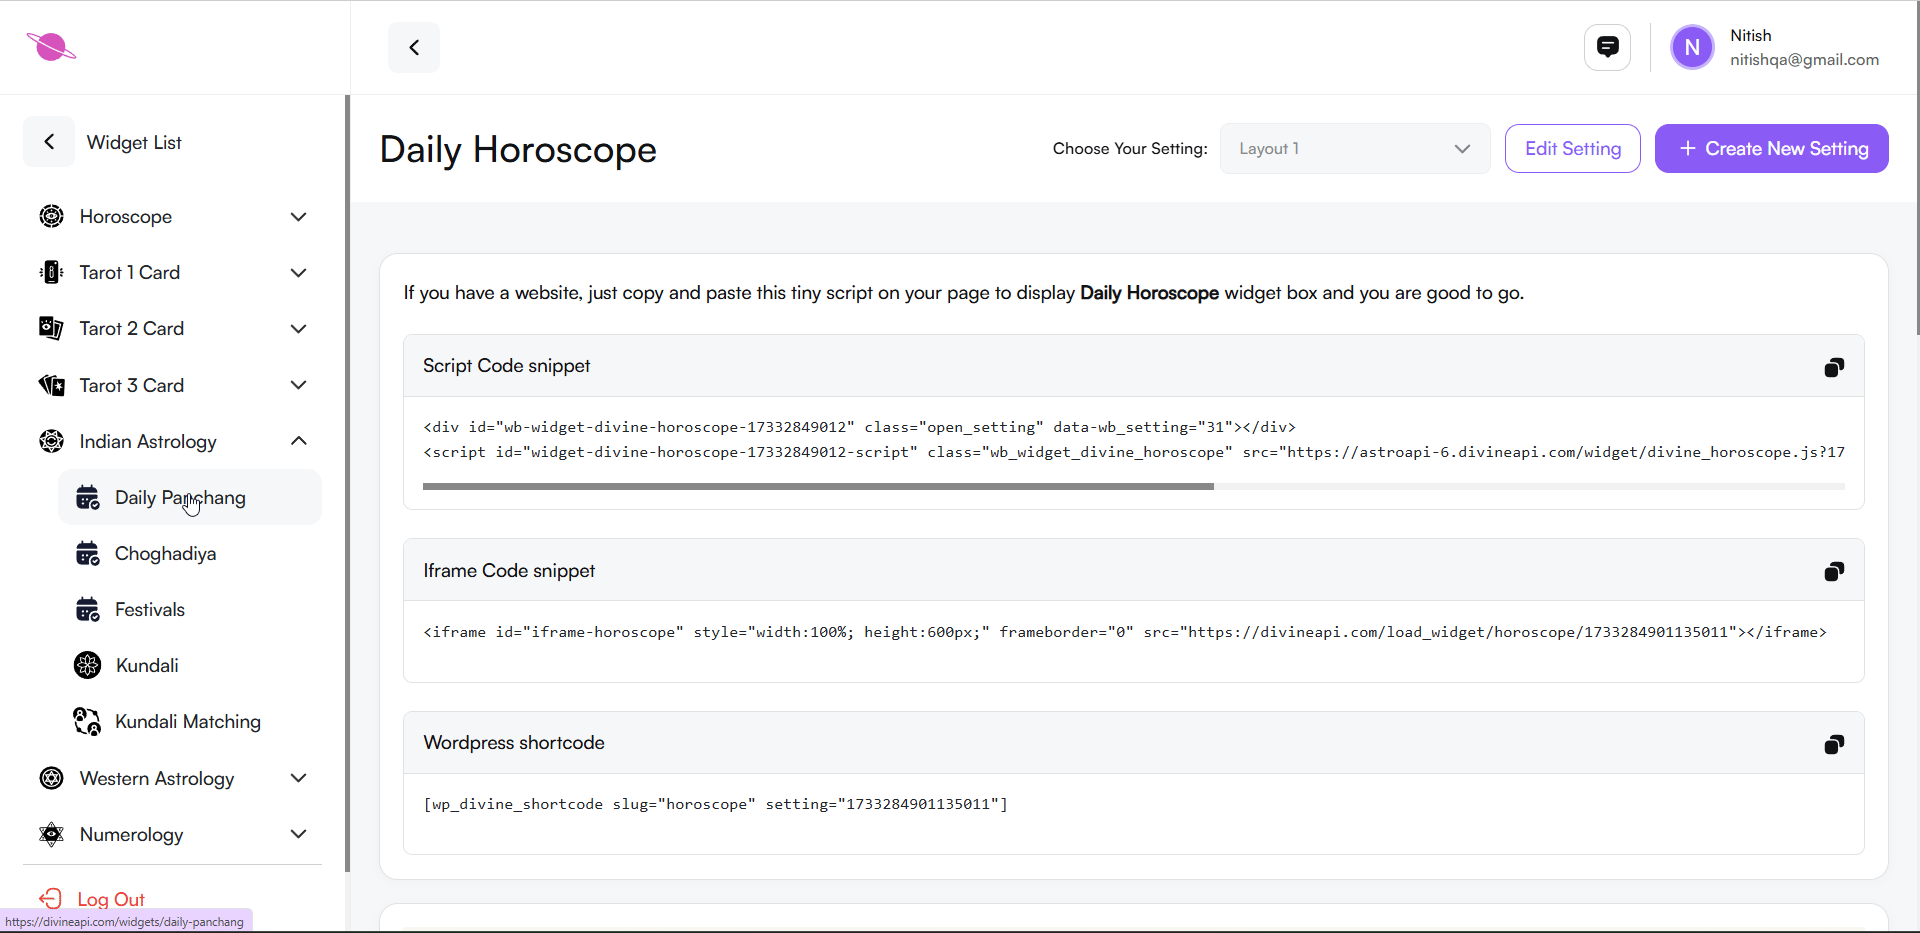
Step 3: Select the Desired Widget
The widgets section displays a variety of options, including Horoscope, Indian Astrology, and Tarot Widgets.
Proceed with the Daily Panchang Widget:
- Click on Indian Astrology to view related widgets.
- Select the Daily Panchang Widget to move to the customization panel.
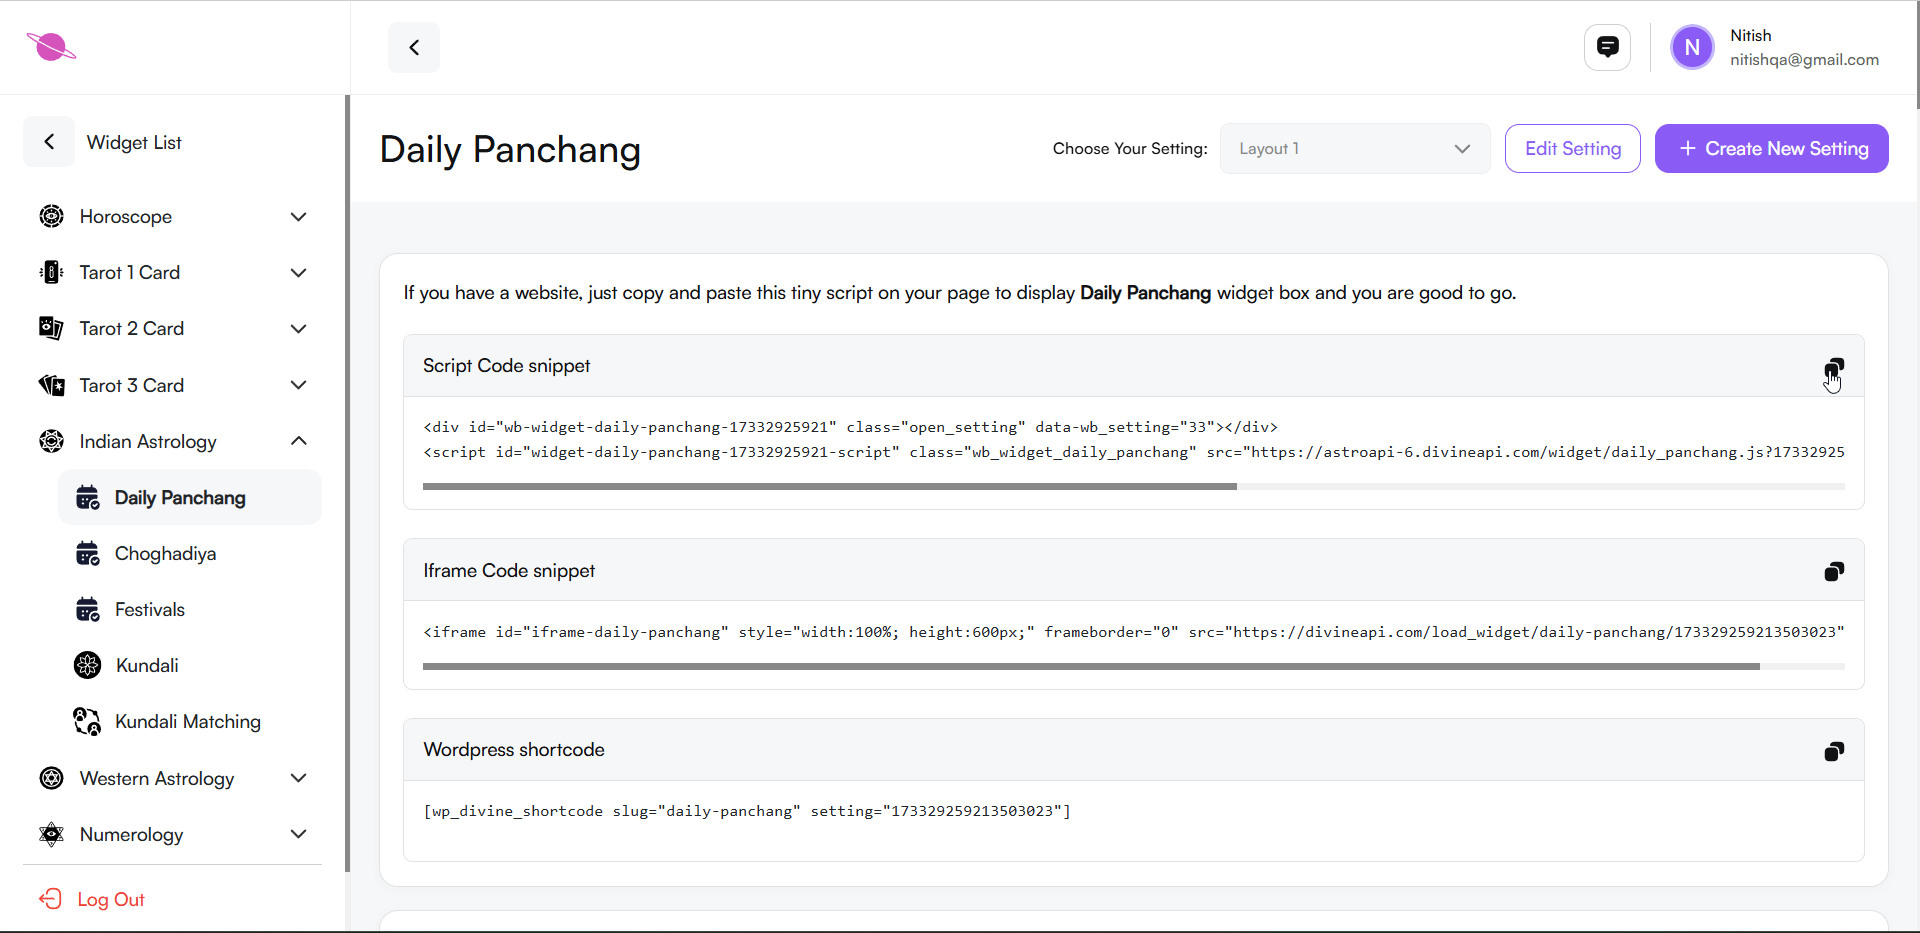
Step 4: Access the Widget Customization Panel
Open the Customization Panel:
After selecting the Daily Panchang Widget, you’ll find customization and integration options.
Choose Your Integration Method:
Depending on your platform, select one of the following:
- Script Code Snippet: Add this code to your website's HTML for a quick setup.
- Iframe Code Snippet: Use iframe embedding for flexibility across platforms.
- WordPress Shortcode: Insert this shortcode into your WordPress page or post.
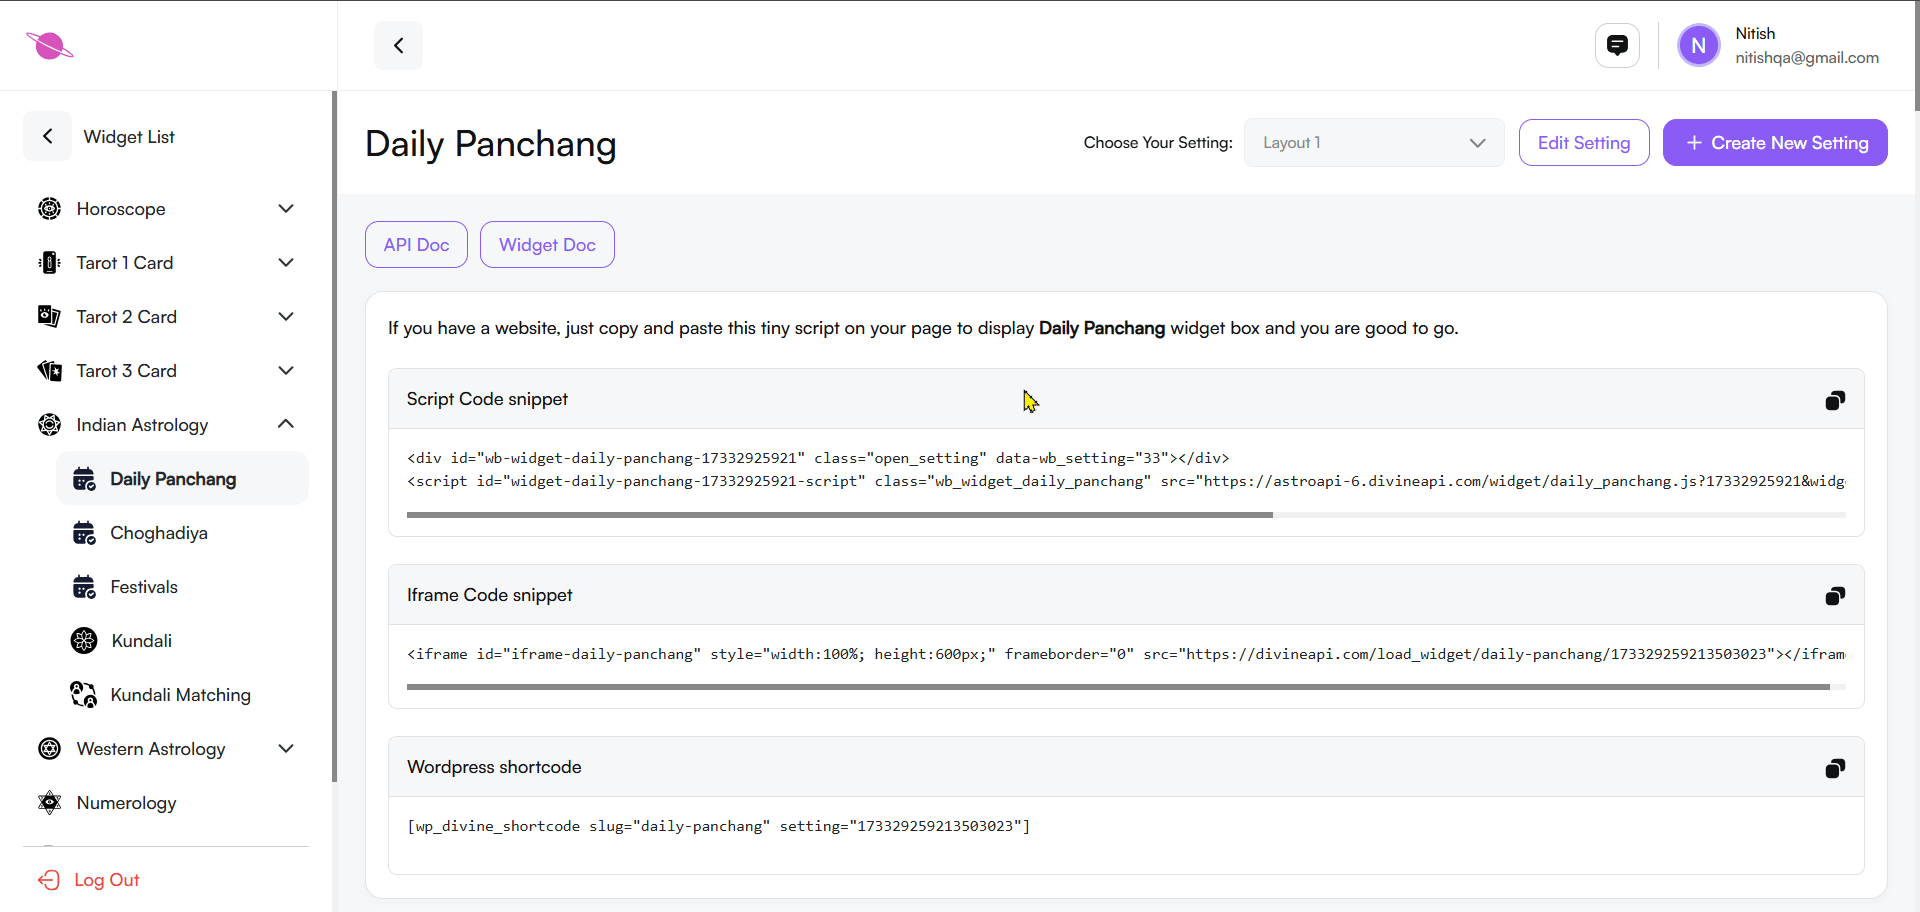
For WordPress Users:
Ensure the required WordPress plugin is installed and activated for shortcode functionality.
Embed the Widget:
- Click the Copy Icon to grab the integration code.
- Paste the code into the appropriate section of your website.
Step 5: Preview Panchang Content
The widget preview provides an overview of daily Panchang information, including:
- Sunrise and Moonrise timings.
- Panchang Details: Tithi, Nakshatra, and other important Vedic calendar information.
- Navigation options for Previous Day, Today, and Next Day.
Engage Your Audience:
Ensure the content is displayed clearly and appeals to your audience by offering accurate and valuable information.
Step 6: Configuring the Widget
Customize the widget's appearance and functionality to align with your page design and user preferences. Follow these steps:
1. Create or Edit Settings for Your Widget:
- To create a new setting, click “+ Create New Setting” at the top-right corner.
- Give your setting a descriptive name, such as “Panchang - Custom 1,” for easy identification.
- Customize the widget by adjusting color schemes, fonts, and layout options.
Edit an Existing Setting:
- Use the “Choose Your Setting” dropdown menu to locate a previously saved configuration.
- Click Edit Setting to update visual elements or modify sections as needed.
For more information on managing multiple widget settings, refer to this detailed guide.
2. Change the Setting Name:
- Update the Setting Name field with a unique title that reflects its purpose.

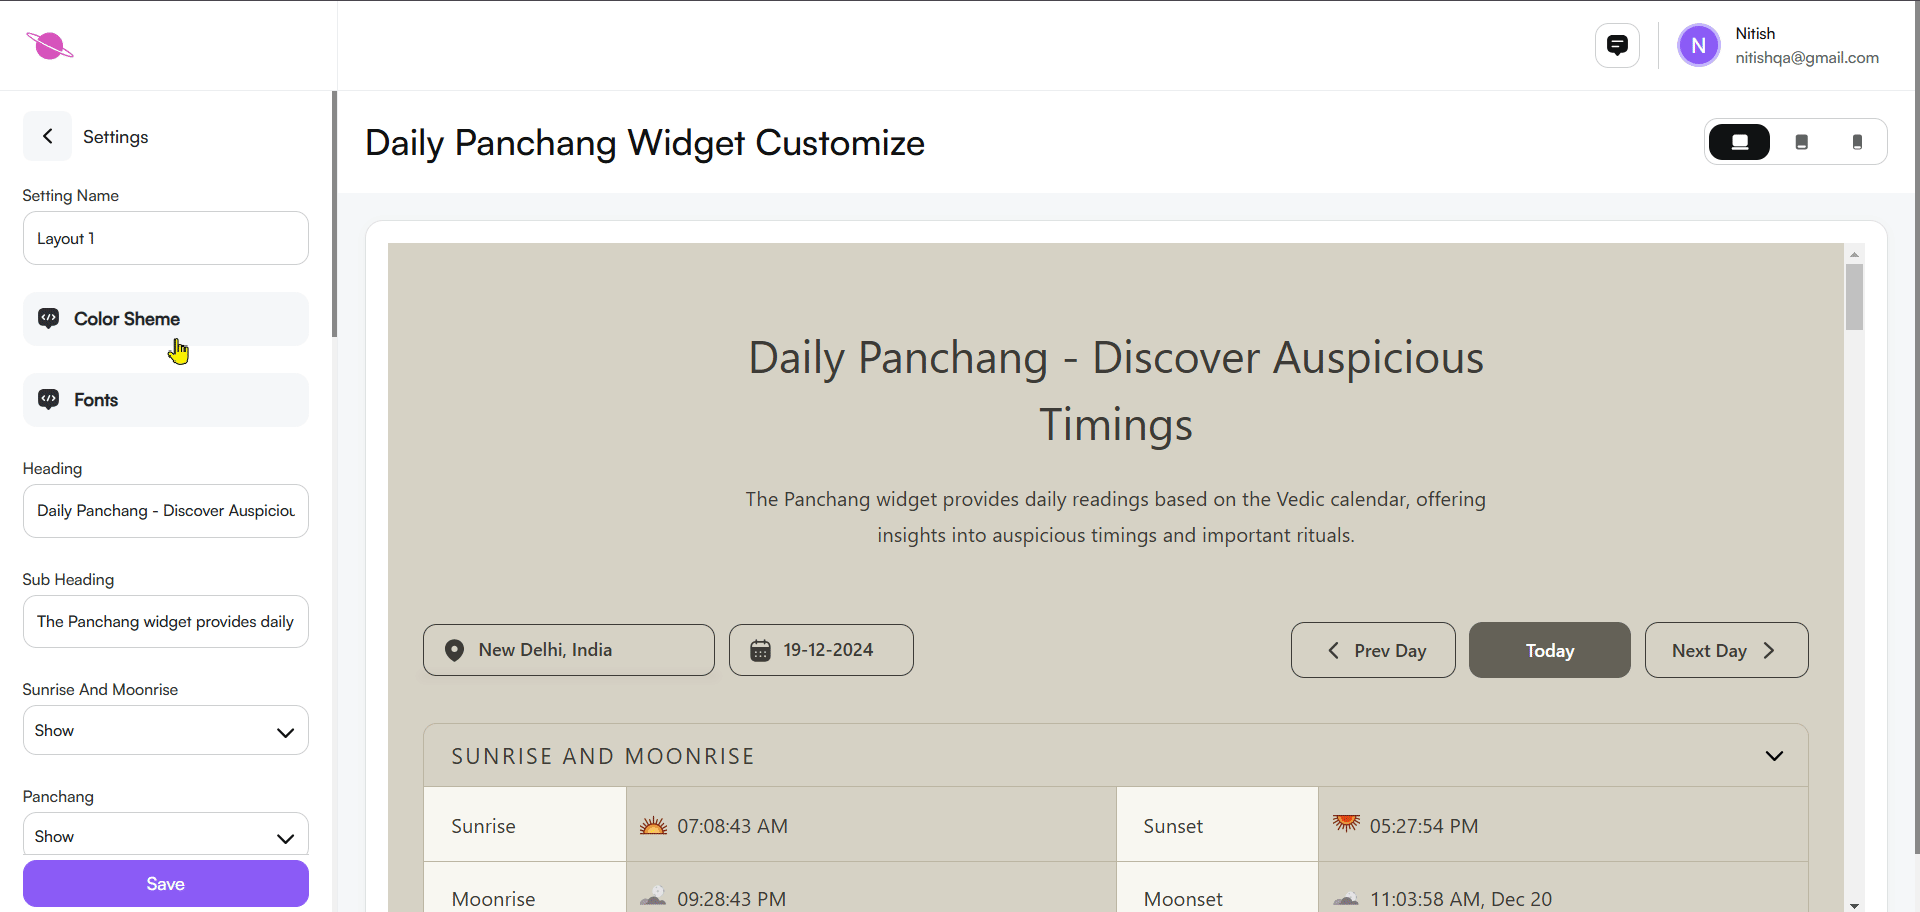
3. Adjust the Color Scheme:
- Choose from pre-designed color themes to align with your website’s aesthetics.
- Fine-tune the colors for key elements like background, text, and lines to achieve a cohesive look.
- Preview all updates in real time within the customization panel.
4. Adjust the Fonts:
- Select a font style that matches your website's theme and enhances readability.
- Experiment with modern, traditional, or minimalistic fonts to find the best fit.
- Real-time previews ensure that your choices look great before finalizing.
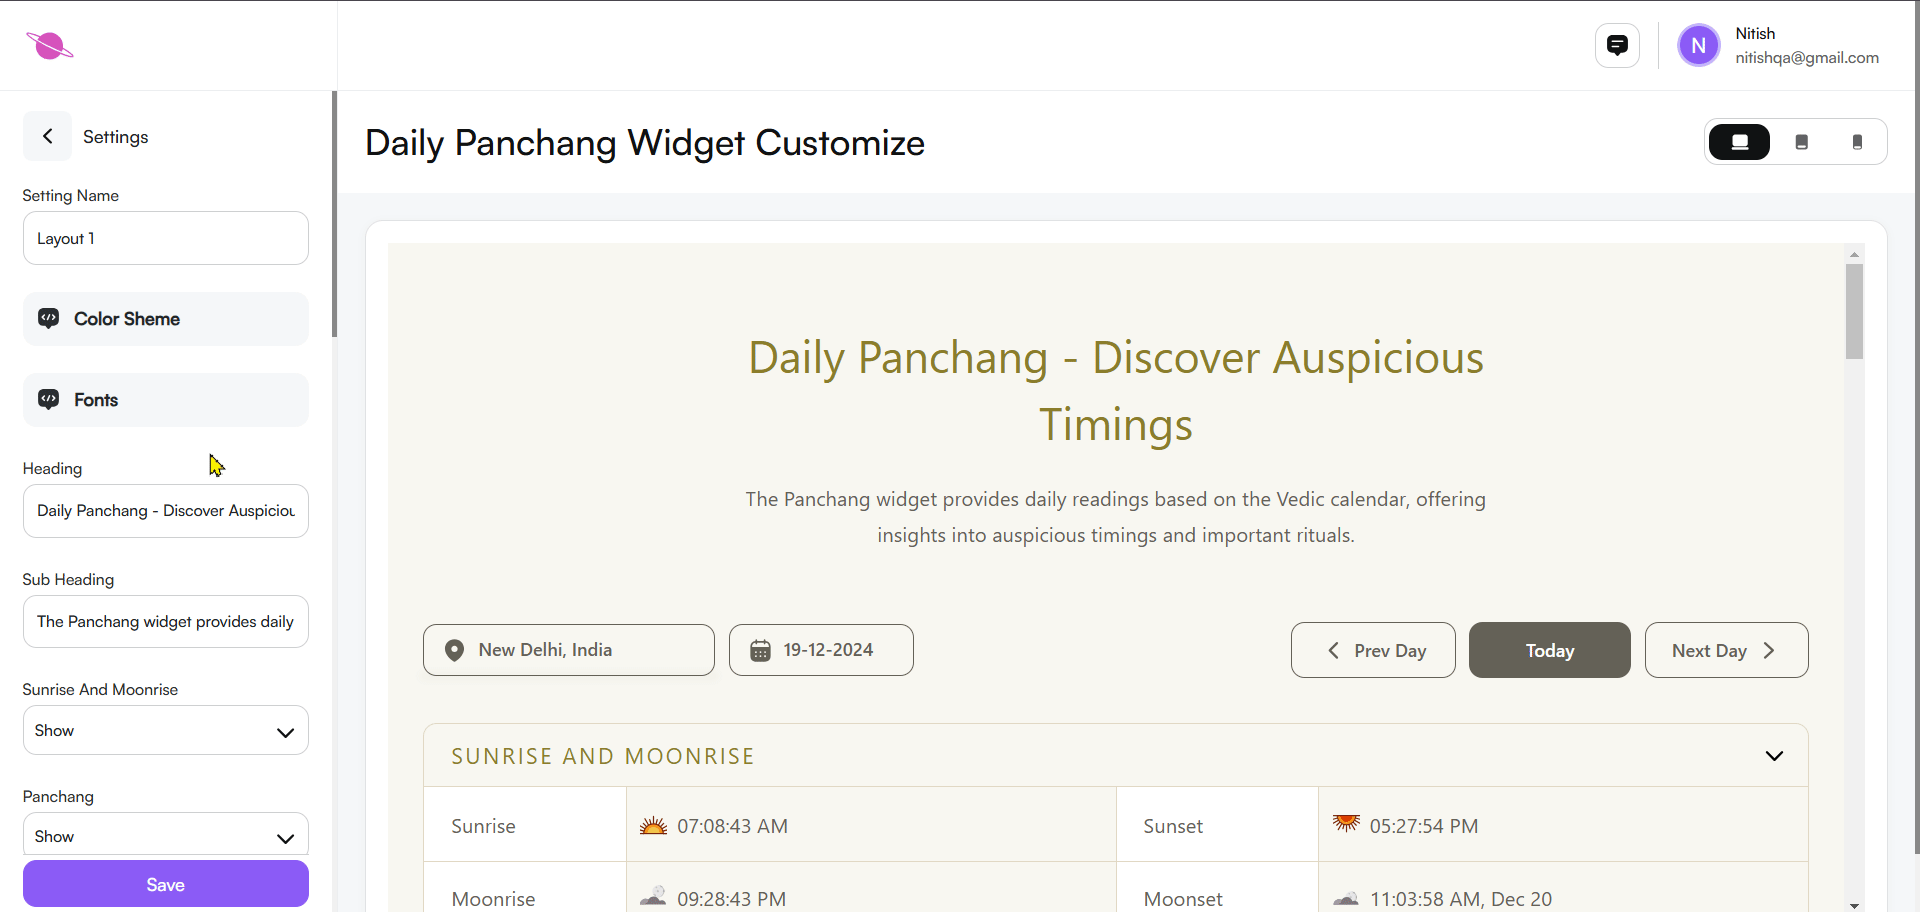
5. Heading and Subheading
Customize the widget's heading and subheading to align with your website's style and message.
Heading and Subheading:
- Update the heading to suit your site (e.g., “Daily Panchang - Discover Auspicious Timings”).
- Add a descriptive subheading, such as “The Panchang widget provides daily readings based on the Vedic calendar, offering insights into auspicious timings and important rituals.”
Note:
You can personalize these texts to suit your needs. Changes will reflect instantly in the widget preview.

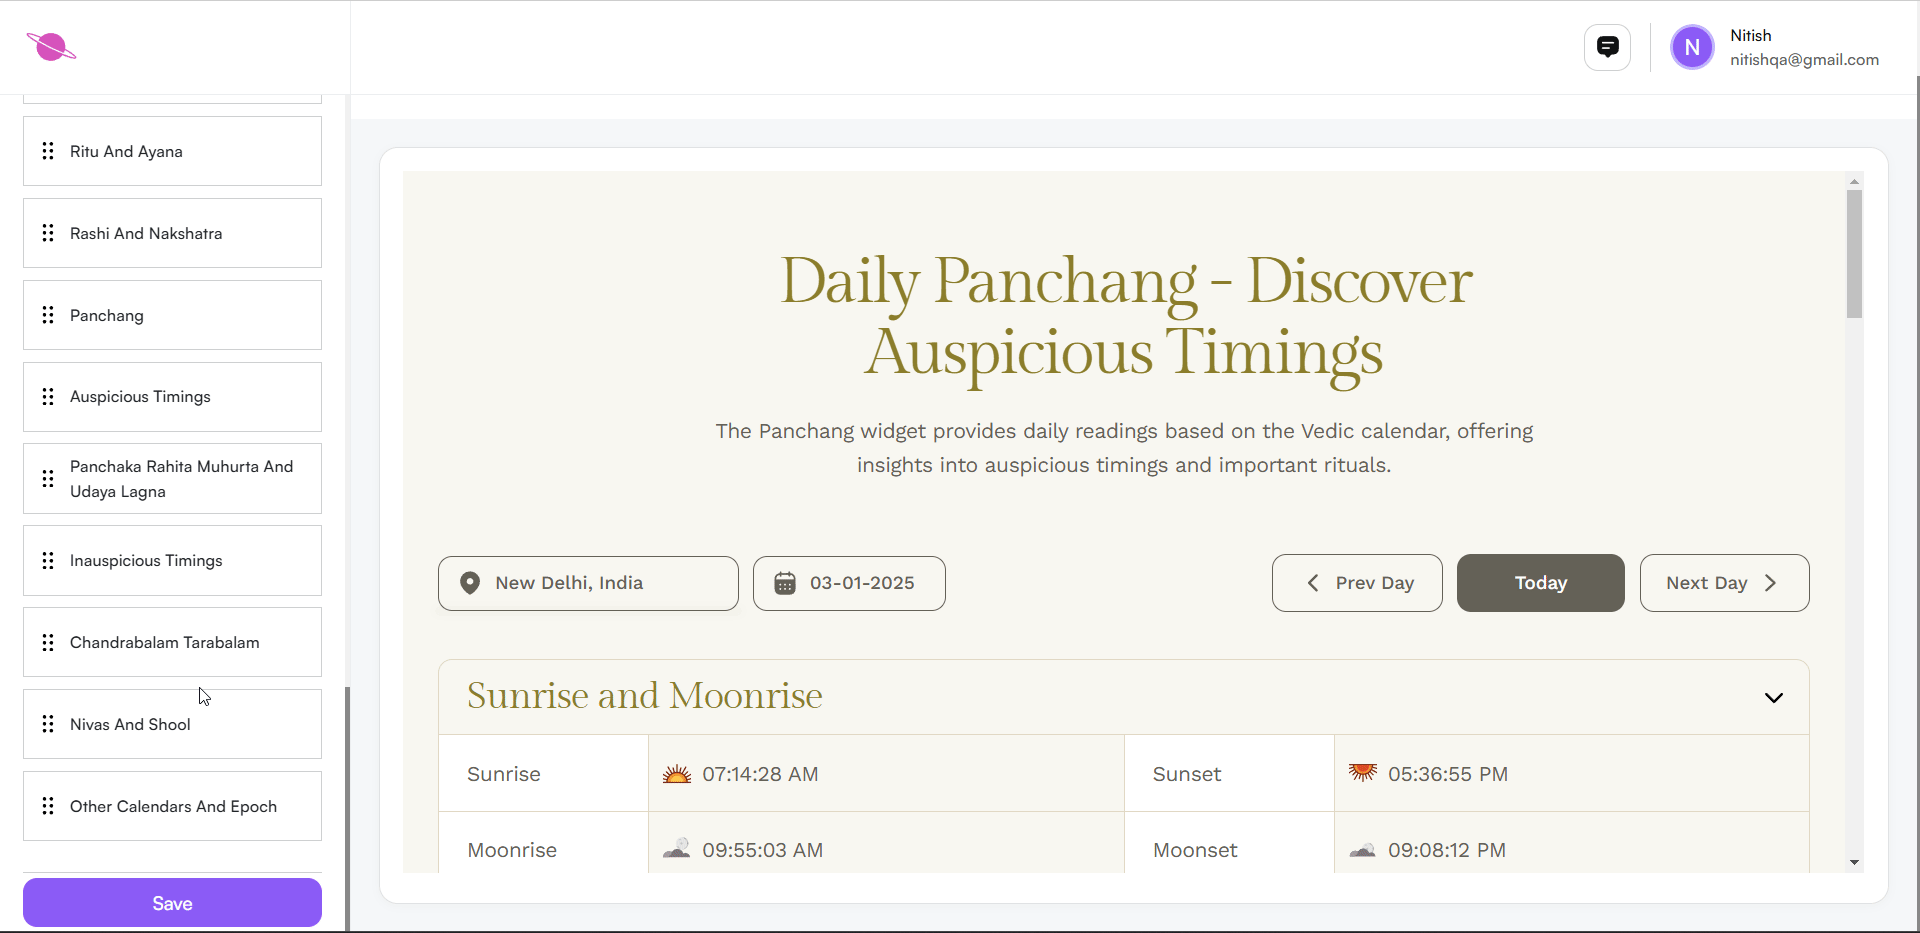
Step 7: Content Sections Visibility
You can control the visibility of specific sections in the Panchang widget to customize what information is shown:
- Sunrise and Moonrise: Display or hide sunrise and moonrise timings.
- Panchang Details: Choose to show or hide essential panchang details like Tithi and Nakshatra.
- Lunar Month and Samvat: Control the visibility of lunar month details, useful for followers of the lunar calendar.
- Rashi and Nakshatra: Display or hide Rashi (zodiac) and Nakshatra (constellation) information.
- Ritu and Ayana: Show or hide information on seasonal divisions and Ayana (solar half-year).
- Auspicious and Inauspicious Timings: Choose to display Mahurat (auspicious times) and inauspicious timings, beneficial for those planning significant activities.
- Additional Sections: Configure other advanced sections like Nivas, Shool, and Chandrabalam Tarabalam if they are relevant to your audience.

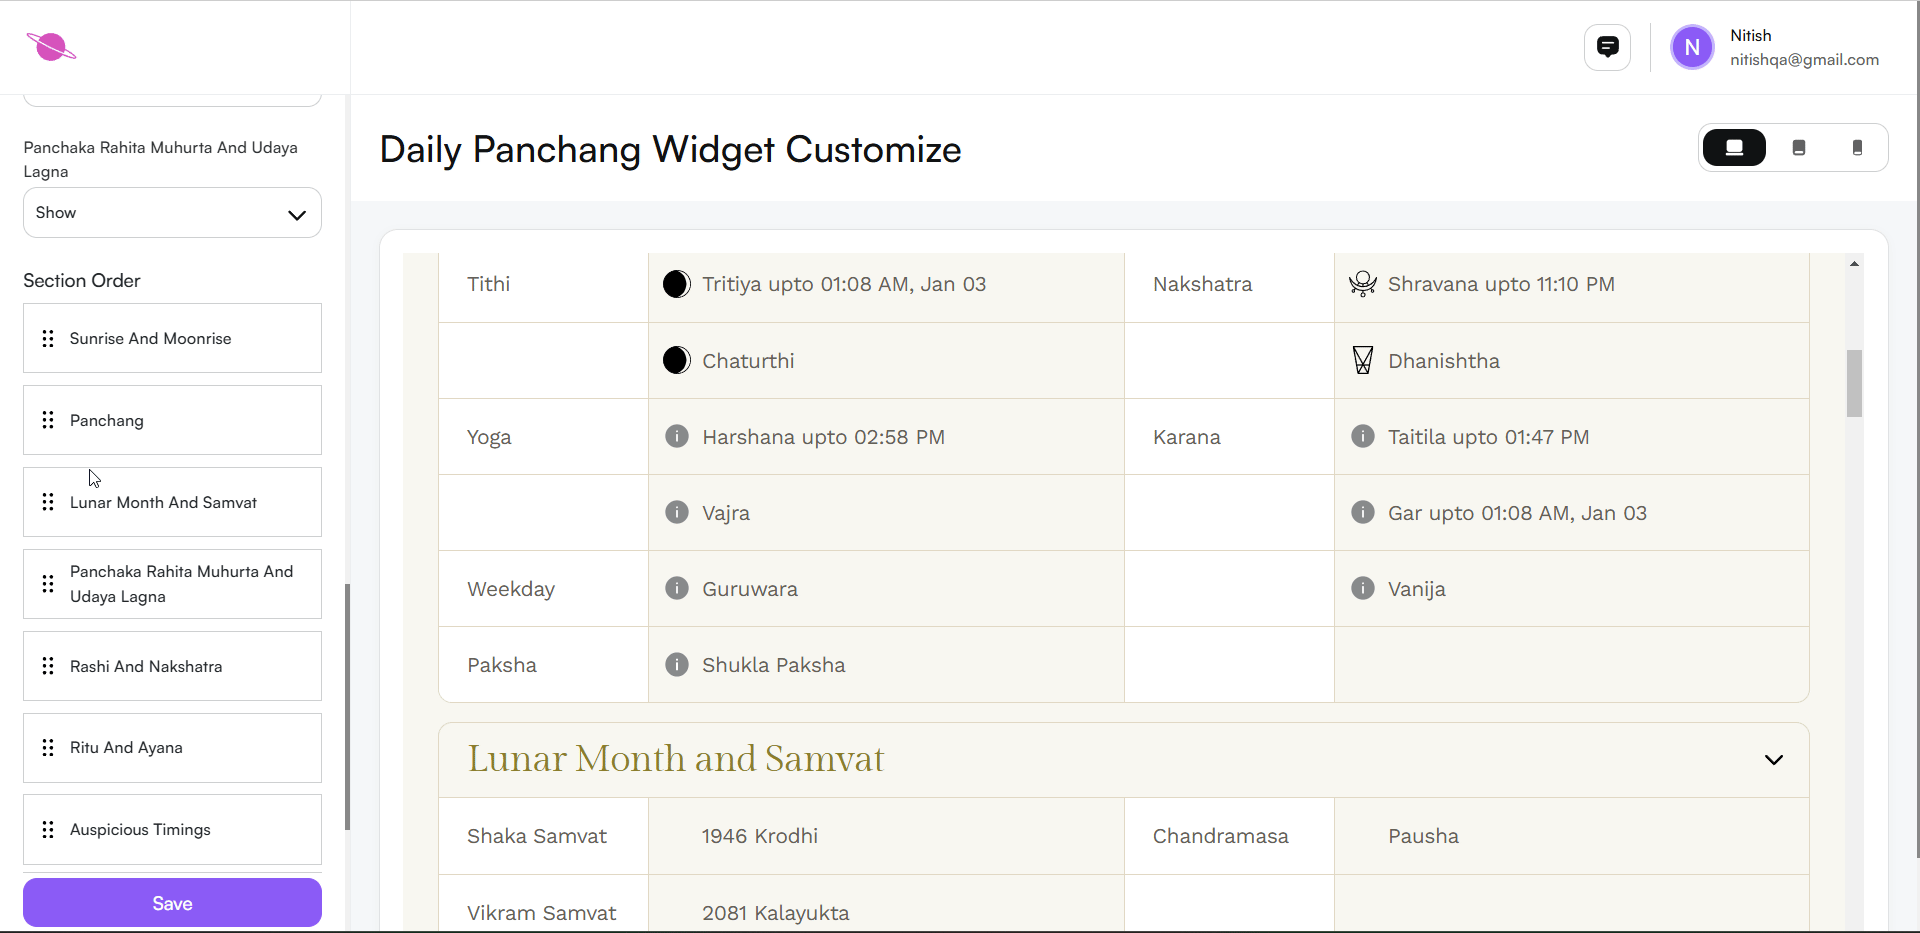
Step 8: Reordering Content Sections
- Reorder Sections: Customize the display order by dragging and arranging sections, such as having Sunrise and Moonrise at the top, followed by Panchang and Nakshatra. Adjusting section order can improve user experience based on the information's priority.
Step 9: Preview Across Devices
Ensure the widget displays perfectly on all devices:
- Desktop View: Check how the widget looks on larger screens.
- Tablet View: Verify compatibility with medium-sized devices.
- Mobile View: Confirm the layout’s responsiveness for mobile users.
Switch between views to provide a seamless experience across platforms.

Step 10: Save and Embed the Widget
Finalize Your Widget:
- Click Save to store all customizations.
- Return to the widget overview by clicking the Back button.
- Copy the integration code and embed it into your website’s HTML or CMS.
Preview Updates:
Ensure that your changes are correctly reflected on your site, and test the widget’s functionality for a flawless user experience.
Conclusion
By following these steps, you can effortlessly integrate a Panchang widget into your page, providing your users with a daily dose of important Hindu calendar details. Configuring, previewing, and publishing your widget enhances the user experience by making traditional timing insights easily accessible and visually appealing.